I'll research the SERP landscape before revising. Checking code and manufacturer sources.
Knowing how to install metal roofing panels is less about strength and more about sequence and precision. A reference line that sits a half inch out of square at the eave becomes a two inch gap by the time you reach the far rake, and a screw that looks fine from the ground can be the reason water finds the deck in year three. Work the steps below in order, because nothing on a metal roof self corrects.
Tools, Materials, and Safety Setup
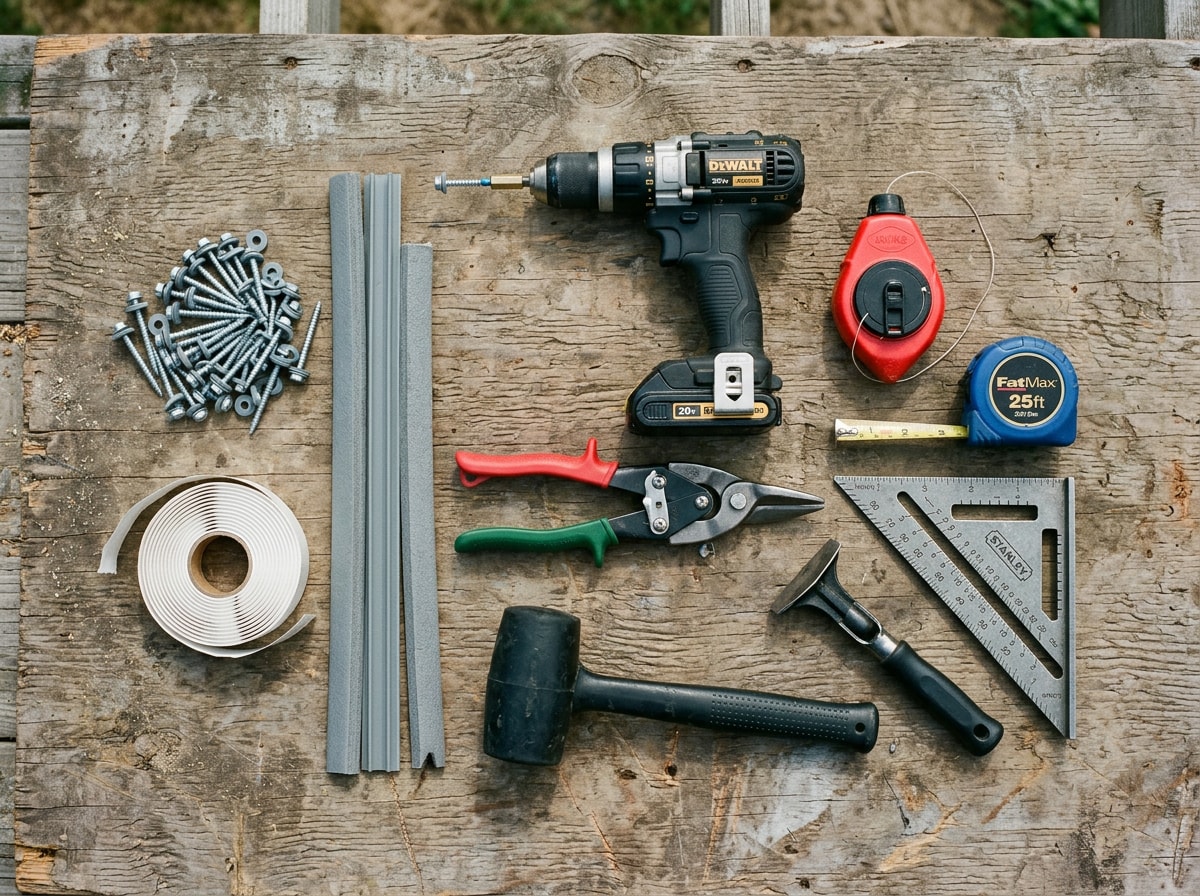
Most of what you need is already in a decent homeowner kit.
Tools:
- Drill with adjustable clutch (the single most important tool choice)
- Aviation snips, left and right cut
- Chalk line, 25 ft tape, roofing square
- Hand seamer and rubber mallet
- Magnetic sweeper
Materials:
- Panels plus 5 to 10 percent overage for miscuts and shipping dings
- Synthetic underlayment and self adhered ice and water membrane
- Gasketed roofing screws with neoprene washers
- Inside and outside foam closure strips
- Butyl tape, color matched sealant
- Drip edge, rake trim, ridge cap
Order the overage up front. Matching a factory finish on a reorder six weeks later is painful and rarely perfect.
Safety is part of the kit, not an afterthought. Federal rules are blunt here: OSHA 1926.501(b)(13) requires that workers engaged in residential construction 6 feet or more above a lower level be protected by guardrail systems, safety net systems, or personal fall arrest systems . Since a single story eave is typically 8 to 10 feet, that threshold applies on virtually every house . Review the OSHA fall protection standard for construction before you set a ladder, and wear cut resistant gloves. Panel edges are genuinely sharp.
Step 1: Prep the Deck and Underlayment
Panel layout only goes well when the groundwork is right.
Walk the deck first. Replace soft or rotted sheathing, reset popped nails, and confirm the deck gives solid screw bite. A metal roof telegraphs whatever is underneath it.
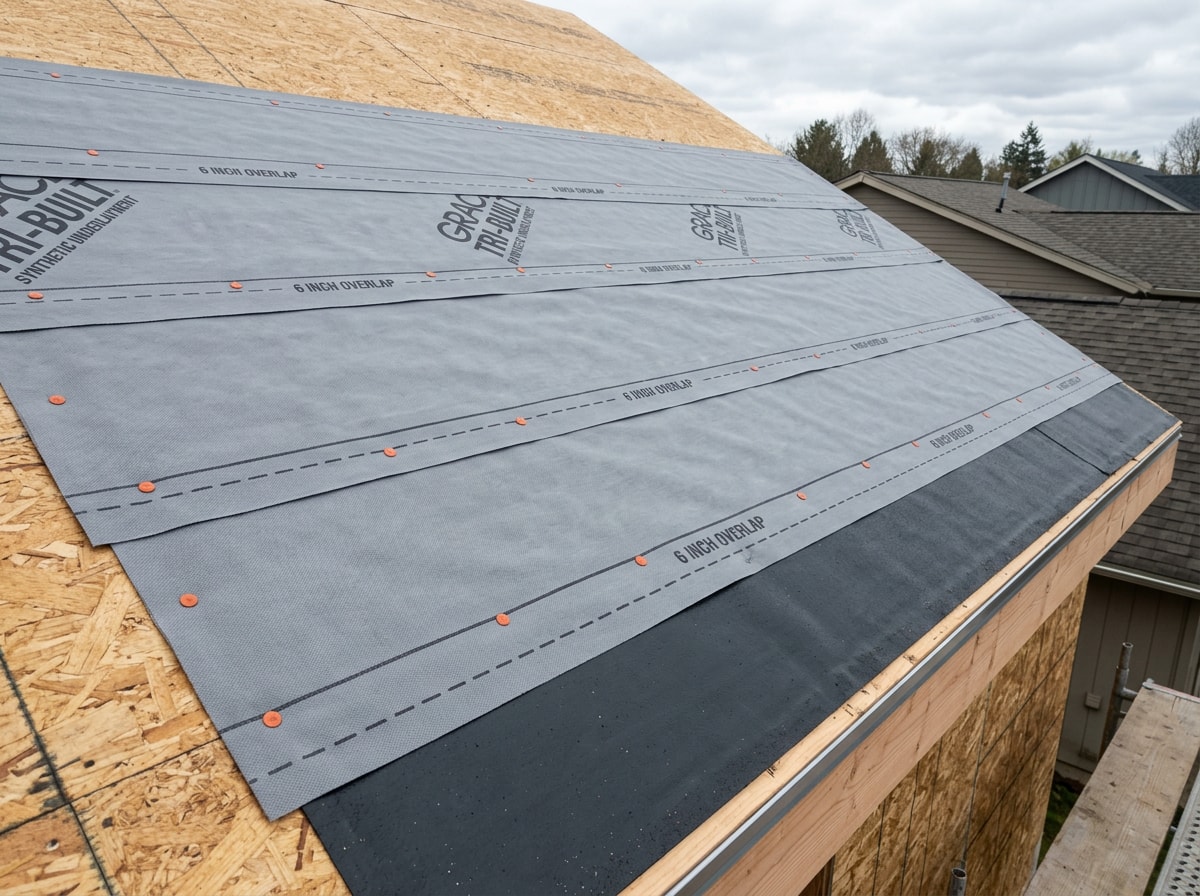
Then install underlayment across the entire deck:
- Run courses horizontally, eave to ridge
- Lap each course over the one below by 6 to 8 inches
- Use self adhered ice and water membrane at eaves and valleys
- Use synthetic underlayment across the field
- Pull every course tight and fasten it flat
Wrinkles matter more than people expect. Ridges in synthetic underlayment show as shadow lines through the panels in raking light, and they create voids where water sits.
If you would rather hand off this stage, our roof installation service page covers what a full deck and underlayment workup includes.
Installing Metal Roofing Over Shingles
A roof over saves a tear off, but it is not automatic.
Start with the deck. If the sheathing will not hold screws reliably, the shingles come off regardless of what the code allows.
Assuming the deck is sound, add underlayment or a slip sheet over the shingles so granules do not abrade the panel backing as the metal moves. On cupped or uneven shingle surfaces, furring strips give you a flat fastening plane and an air gap that helps with condensation.
Layer count is a code question, and your local jurisdiction has the final say. In the International Residential Code reroofing provisions, roof replacement requires removing existing layers down to the deck , while a roof recover is permitted where the new covering is installed per the manufacturer's approved instructions . The hard stop: a recover is not allowed where the existing roof already has two or more applications of any type of roof covering . Local amendments vary, so call your building department before you order panels.
Order Panels to Fit
Measure each roof plane separately from eave to ridge, then add your overhang allowance, usually about an inch past the drip edge.
Single length panels beat lapped courses wherever you can get them, since every horizontal end lap is another place water has to be managed.
One practical limit: very long panels are heavy, floppy, and awkward to lift. Without a panel lift or a second set of hands, order shorter lengths and plan for a lapped course.
When cutting, use aviation snips or a metal rated blade, cut on the ground rather than on the roof, and sweep shavings off finished surfaces immediately. They rust and stain within days.
The Thermal Movement Math Most Guides Skip
Here is the number almost no DIY guide publishes, and it decides your panel length.
Metal panels grow and shrink with temperature, in direct proportion to unbroken length. The coefficient of thermal expansion for steel is roughly 0.0000065 inch per inch per degree F, and for aluminum it is about 0.0000128 . Run that out and a 100 foot steel panel across a 100°F swing grows about 0.78 inch, while an aluminum panel of the same length grows about 1.56 inch .
| Panel material | Panel length | 100°F temperature swing | Approx. movement |
|---|---|---|---|
| Steel | 20 ft | 0 to 100°F | about 1/8 in. |
| Steel | 40 ft | 0 to 100°F | about 5/16 in. |
| Aluminum | 20 ft | 0 to 100°F | about 1/4 in. |
| Aluminum | 40 ft | 0 to 100°F | about 5/8 in. |
Two takeaways for an exposed fastener job:
- Panel surface temperature runs well above air temperature.
The peak temperature a panel sees is significantly higher than peak air temperature because it absorbs solar energy all day , so a 100°F design swing is conservative in Virginia, not generous.
- End laps do not relieve movement.
An end lap is treated as a rigid attachment, so the governing length is the sum of the lapped panels, not each piece .
That is why oversized screw holes elongate and washers tear on long exposed fastener runs, and why the manufacturer's maximum panel length is a real limit rather than a suggestion. The Metal Sales technical note on thermal expansion shows the full calculation if you want to run your own numbers.
In 14 years of roofing work around Fredericksburg, the exposed fastener roofs we get called to repair almost never fail in the field of the panel. They fail at long end laps and at screw lines on runs that were ordered too long for the profile.
Step 2: Square the Roof and Set the First Panel
Strike a chalk line at a true 90 degrees to the eave using the 3-4-5 method. Measure 3 feet along the eave, 4 feet up the rake, and adjust until the diagonal between those marks reads exactly 5 feet. That line controls every panel on the plane.
Before you drive a single screw into panel one, measure from the panel edge to your line at both the top and the bottom. If the two numbers disagree, fix the alignment now.
Then set the first panel:
- Lay an inside foam closure strip about an inch back from the eave edge, bedded on butyl tape.
- Run a bead of sealant along the top of the closure.
- Set the panel with roughly a one inch overhang past the drip edge, aligned to the chalk line.
- Press it into the sealant and check the overhang at both ends before fastening.
Those closures do real work. They fill the voids under the ribs that otherwise let wind driven rain, insects, and nesting birds under a brand new roof.
Step 3: Drive the Screws Correctly
At the eave, place screws on both sides of every rib, driving through the closure. Above that, keep fastener rows no more than about 24 inches apart, with a screw at each rib on the overlap side. Work bottom up toward the ridge and seat every screw flat.
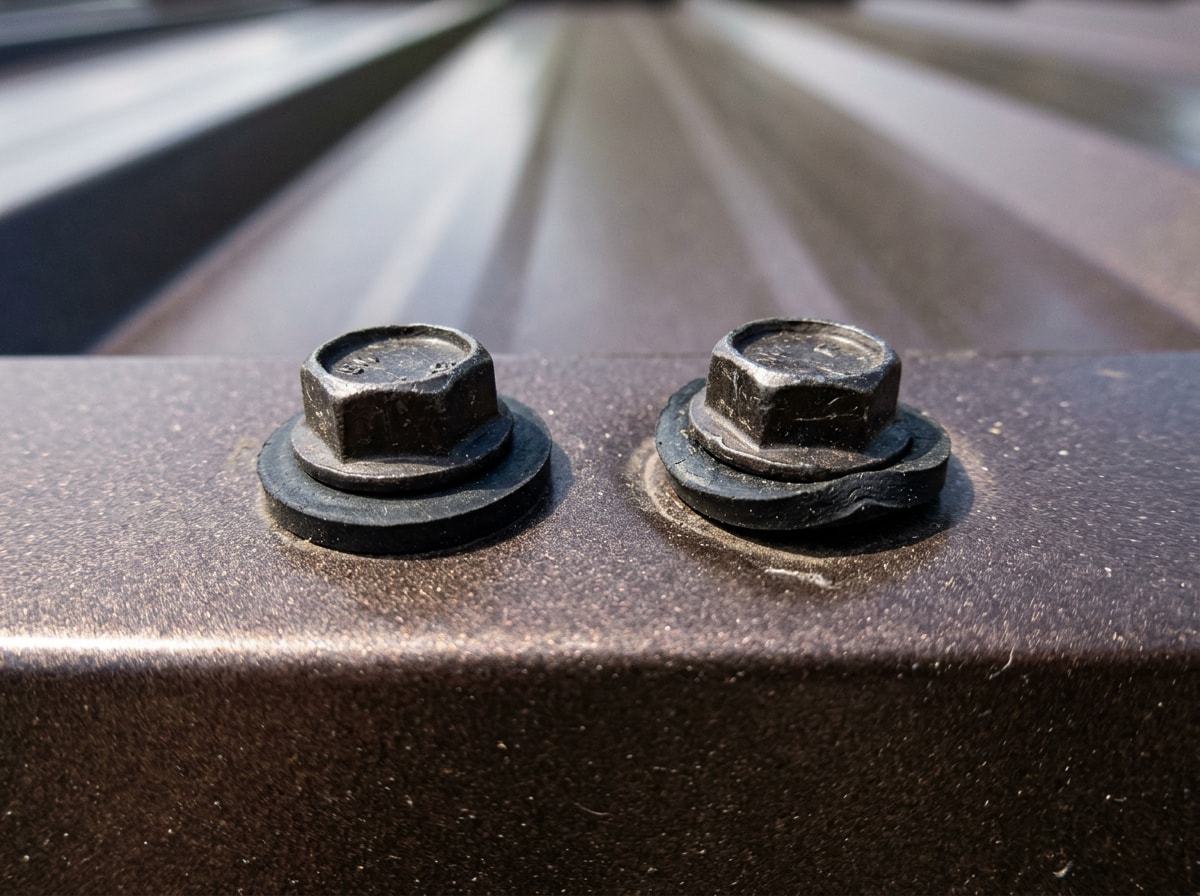
The torque rule: compress the neoprene washer until it just reaches the edge of the screw head, then stop. This is exactly why a clutch equipped driver earns its keep.
Three ways a screw fails:
- Under driven: washer uncompressed, gap under the head, water wicks in.
- Over driven: washer squeezed out past the head and dimpled metal that ponds water.
- Off angle: one side of the washer bears, the other side stays open.
Flat or rib? Guides contradict each other because the answer is profile specific. Exposed fastener corrugated panels typically fasten through the flats, some fastener flange profiles fasten at the rib, and standing seam uses concealed clips with no field screws at all. High wind and hurricane zones carry their own prescribed patterns and tighter spacing. Follow your panel manufacturer's published installation specification, because it governs the warranty and overrides generic advice, including this page.
Step 4: Lap the Panels
The two long edges of a panel are not interchangeable. One side carries a short rib leg designed to sit on top. The underlapped rib carries an anti siphon channel that drains anything that gets past the seam. Flip a panel and that channel stops working.
Lay the larger edge so the next panel's small edge covers it, then press the side lap down fully along its length.
Re-measure to your reference line every three or four panels instead of waiting until you hit the rake. Corrugated profiles have their own lap rules, covered in our guide to overlapping corrugated metal roofing.
| Detail | Typical practice | Final authority |
|---|---|---|
| Eave overhang | About 1 in. past drip edge | Panel manufacturer |
| Side lap | One full rib | Panel profile |
| End lap | Several inches plus sealant | Manufacturer spec |
| Fastener rows | 24 in. or less | Manufacturer and wind zone |
| Ridge cap laps | Several inches, lapped away from prevailing wind | Manufacturer |
Step 5: Flashing, Rake Trim, and Ridge Cap
Field panels shed water. Trim and flashing are what actually keep it out.
Valley, sidewall, and pipe boot flashing go in as the panels reach them, before trim closes anything up.
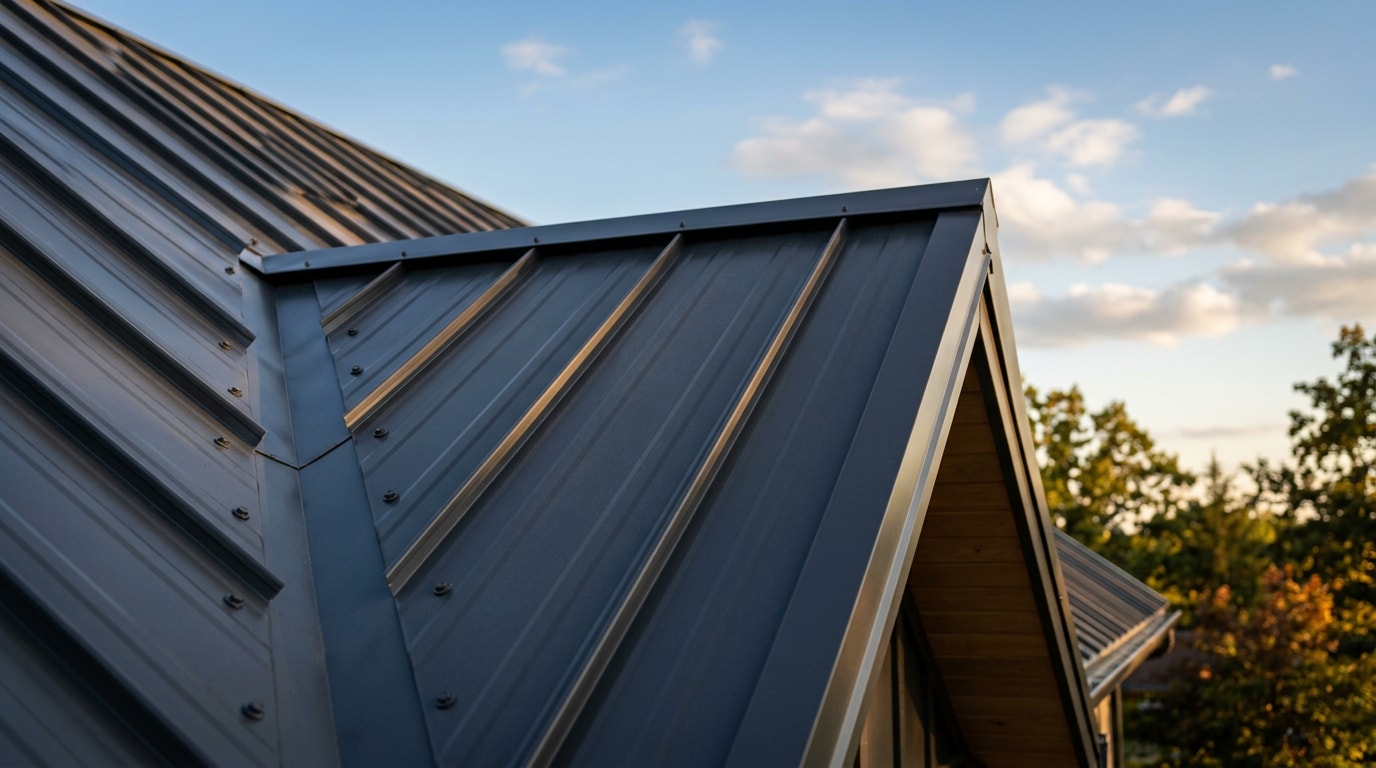
Rake edge: Bend the end of the gable trim down so it closes against the corner at the eave, dry fit the run, then lay butyl tape on the underside where it lands on the panel flat. Press the trim into the tape and fasten about every 12 inches, driving through the tape so each screw is sealed. This is what stops wind driven rain and blowing snow from tracking sideways under the panels and down behind the siding.
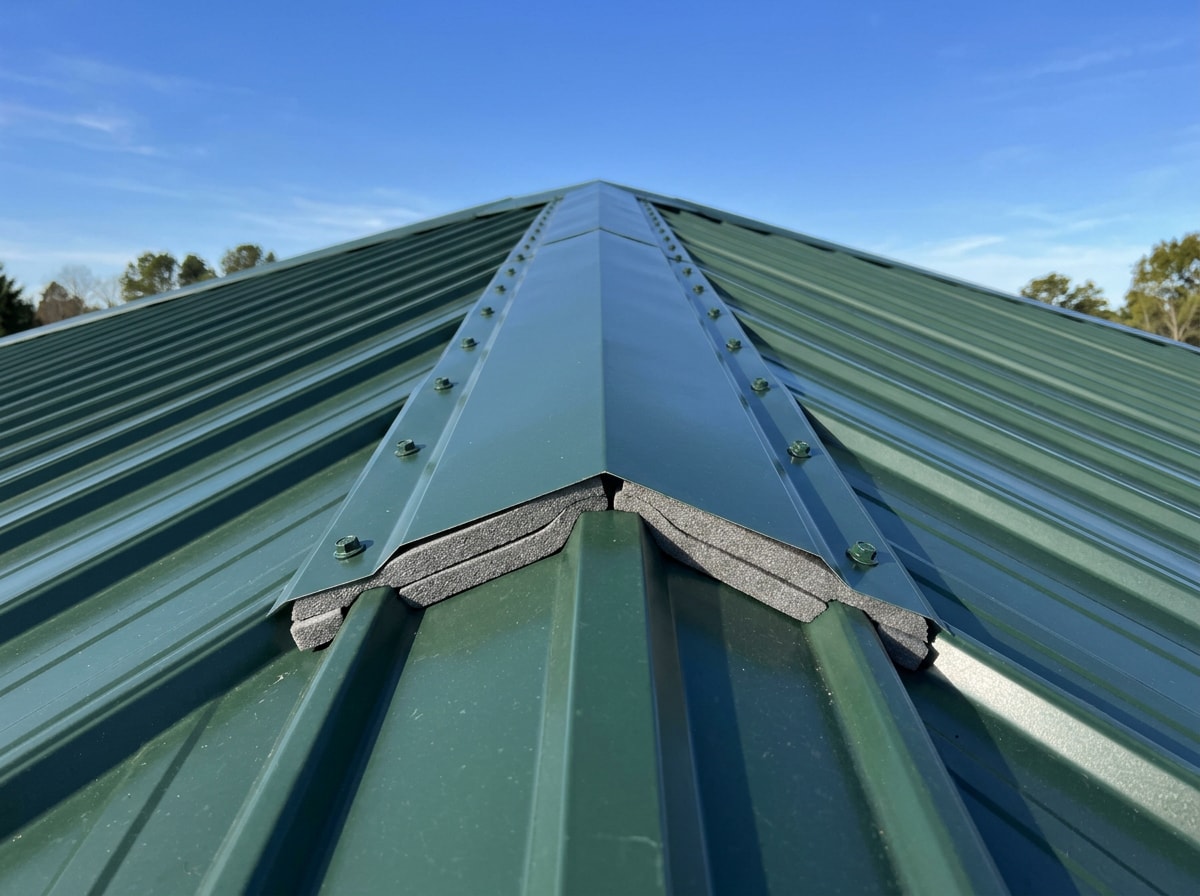
Ridge: Set outside closure strips about four inches down from the peak on both slopes, bedded on butyl tape so they follow the rib profile exactly. Run sealant across the top, set the ridge cap, and fasten through every rib with screws long enough to reach solid decking. Lap cap sections away from the prevailing wind direction.
Pick your closure type deliberately. Solid closures seal the ridge completely, vented closures let the assembly breathe as part of a ridge vent system. The closure is the seal and the cap is only the cover.
Final Checks Before You Call It Done
- Sweep every panel with a magnetic sweeper and a broom. Leftover shavings rust into permanent orange freckles within weeks.
- Touch up field cuts and scratches with manufacturer matched paint, never hardware store enamel.
- Sight down each fastener row for a screw that is proud, buried, or crooked.
- Confirm sealant at every lap, trim run, and penetration.
- Clear gutters of offcuts and debris.
Schedule one more look a year later. A professional roof inspection after a full heat and freeze cycle catches backed out screws while they are still a 10 dollar fix.
When to Hand It to a Crew
Know the limits of a DIY metal roof. Steep pitches, tall eaves, standing seam with concealed clips, complex valleys, and warranties that require certified installation all belong with a professional crew.
Shark Construction handles metal and asphalt work across Fredericksburg, Stafford, and Spotsylvania, and you can browse completed work on our projects page or start at our homepage.
If the job is bigger than a shed or a garage, get a free estimate before you buy panels. A measurement error caught on paper costs nothing. The same error caught on the roof costs a full panel order.
Full tear off and reinstall work is covered on our roof replacement page, and storm damage goes through emergency roof repair.
FAQ
Can you install a metal roof over shingles?
Often yes, with conditions. The deck must hold fasteners, and a recover is not allowed where the roof already has two or more applications of any roof covering . You also need underlayment or a slip sheet, and furring strips if the shingle surface is uneven. Confirm with your building department first.
What should go under a metal roof?
Underlayment, always. Use synthetic underlayment across the field with ice and water membrane at eaves and valleys, over sound plywood decking. A slip sheet or underlayment layer also prevents abrasion against the panel backing as the metal moves.
Do metal roofing screws go in the flat or the rib?
It depends on the profile. Many exposed fastener panels are screwed through the flats, certain profiles fasten at the rib, and standing seam uses hidden clips. Follow the instructions for your specific panel.
How much should metal roofing panels overlap?
Side laps are usually one full rib, set by the panel profile. End laps typically need several inches plus sealant. The exact figure comes from the manufacturer's spec sheet, not a rule of thumb.
What is the minimum roof pitch for metal panels?
Exposed fastener panels generally need a steeper slope than mechanically seamed standing seam, and each manufacturer publishes its own minimum. Check the profile's listed minimum slope before you order, because installing below it voids the warranty and invites capillary leaks at laps.
Can a beginner install metal roofing alone?
On a low shed or detached garage, yes, with fall protection and a helper. On a two story house with valleys, dormers, or a steep pitch, no. Panel handling in wind is the risk most first timers underestimate.
Do you need furring strips under metal roofing?
Only in specific cases. They are used over uneven shingles, over spaced sheathing, or when the assembly needs a vented air gap. Over flat, sound plywood with underlayment, panels can usually fasten directly to the deck.
How long does a metal panel roof take to install?
A simple gable garage roof is often a weekend for two people. A full house with multiple planes, valleys, and penetrations typically runs several days for a professional crew, and considerably longer for a first time DIY installer.
Reviewed by the roofing team at Shark Construction LLC, a licensed and insured exterior contractor serving Fredericksburg, Stafford, Spotsylvania, and surrounding Virginia communities. Questions about a specific roof? Contact us or see our full roofing contractor services.