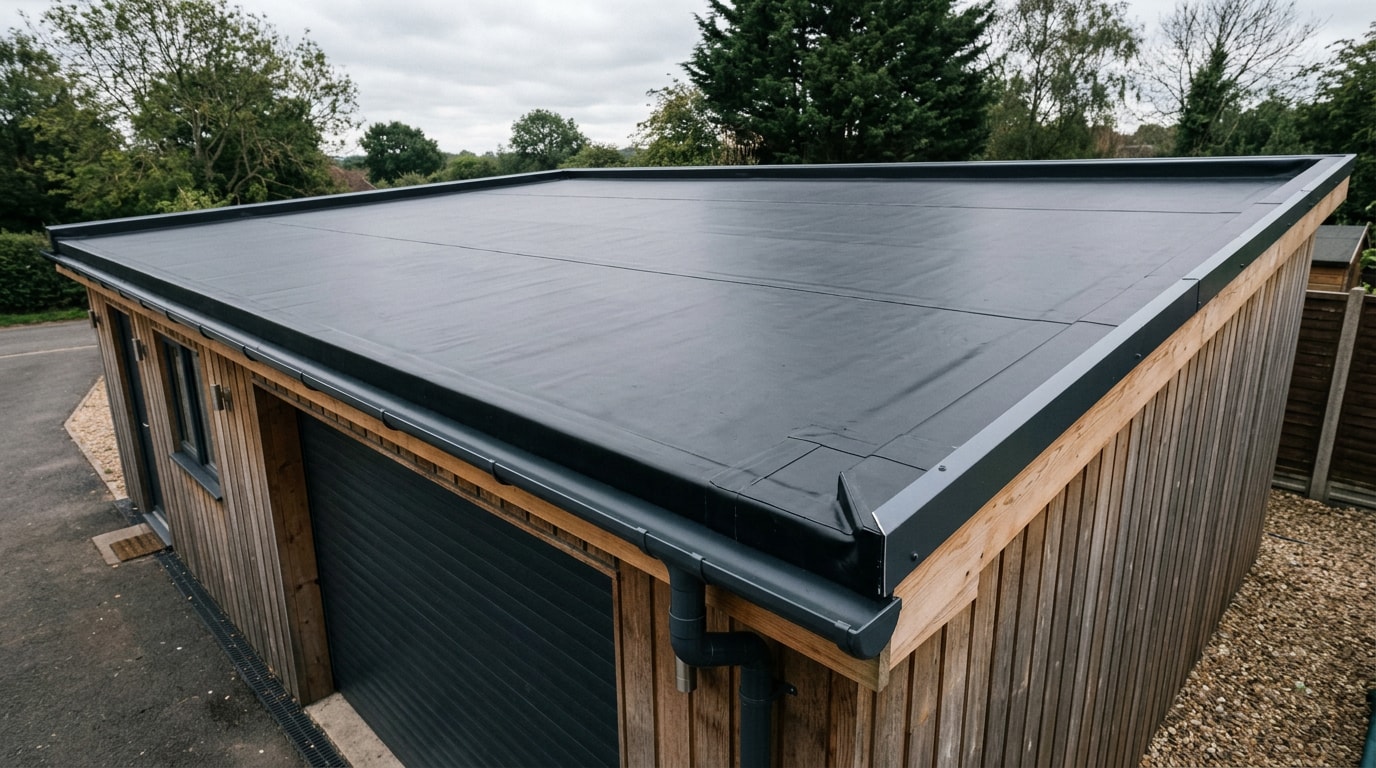
Learning how to install rubber roofing is realistic for a confident DIYer, because EPDM needs no torch, no hot-air welder, and no nail gun. The catch is that almost every rubber roof that fails early fails for the same three reasons: a dirty deck, a rushed adhesive stage, or a sloppy edge. Get those right and the rest is mostly patience.
How to Install Rubber Roofing: The Short Version
If you want the whole sequence before the detail, here it is:
- Strip, sweep, and repair the deck until it is flat, dry, and fastener-free.
- Measure the roof, add allowances, and cut the membrane oversize.
- Lay the sheet out and let it relax for 30 to 60 minutes.
- Fold back half the sheet and roll water-based adhesive onto the deck only.
- Roll the membrane back into the wet adhesive and broom out the air.
- Repeat on the second half, leaving the perimeter unglued.
- Bond the perimeter band and all upstands with contact adhesive on both faces.
- Tape any seams, trim the overhang, fit the edge trims, and seal the joints.
A single-sheet garage roof runs about three to five hours start to finish. Allow a full weekend if it is your first one.
Tools and Materials You Need
Nothing here is exotic, and most of it fits in one trip. A packaged rubber roof kit usually bundles the membrane, adhesives, and lap sealant, but rarely the trims and almost never the tools.
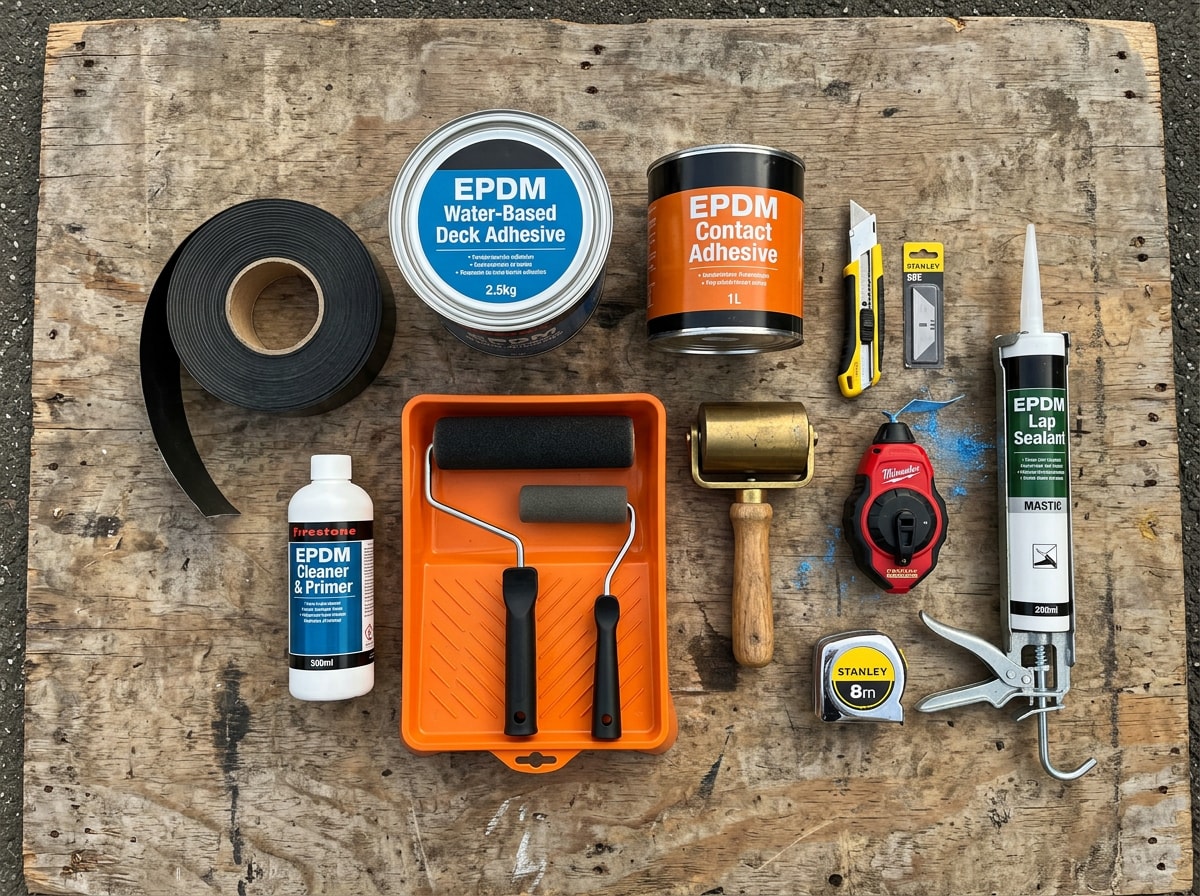
Tools
- 9 inch paint roller with tray, plus a 4 inch mini roller
- Stiff push broom
- Heavy-duty utility knife with spare blades
- Seam roller (weighted or penny roller)
- Chalk line, tape measure, hammer, cordless drill
Materials
- EPDM membrane sized to the roof
- Water-based deck adhesive and contact (bonding) adhesive
- Seam tape, seam primer, and EPDM cleaner
- Kerb trim, drip trim, corner pieces, termination bars, lap sealant
Buy roughly 10 percent extra on adhesive. Running dry halfway across a wet-bonded sheet is the worst possible time to drive to the supplier.
| Product | Where it goes | Typical coverage | Rough need on a 400 sq ft roof |
|---|---|---|---|
| Water-based deck adhesive | Deck only, field area | 60 to 80 sq ft per gallon | 4 to 6 gallons |
| Contact adhesive | Both faces, perimeter and upstands | 30 to 60 sq ft of finished area per gallon | 1 to 2 gallons |
| Lap sealant | Trim joints, top of wall flashing | 20 to 25 linear ft per tube | 3 to 4 tubes |
Coverage varies by brand and substrate, so confirm against the data sheet printed on the tin.
Add gloves, non-slip boots, knee pads, and fall protection. Work six feet or more above a lower level falls under OSHA's duty to have fall protection rule, and gravity does not care whether you are a contractor or a homeowner.
Step 1: Prepare the Roof Deck
Poor deck prep causes more early EPDM failures than any other single factor. Every tear-off our crews open tells the same story: the leak started at a seam, an edge, or a fastener head left proud of the sheathing.
Work through it in order.
- Sweep every scrap of grit and debris off the deck.
- Pull or hammer flat every proud nail and screw head. One sharp fastener punctures a membrane from below within a season.
- Press firmly with your heel across the whole surface to find soft spots, rot, and delamination.
- Replace anything compromised, then strip old felt or bitumen unless it is sound, flat, and you are deliberately overboarding.
Your substrate should be exterior-grade plywood or OSB3, typically 3/4 inch minimum over standard joist spacing. Fill gaps wider than about 1/8 inch and sand the joints flush.
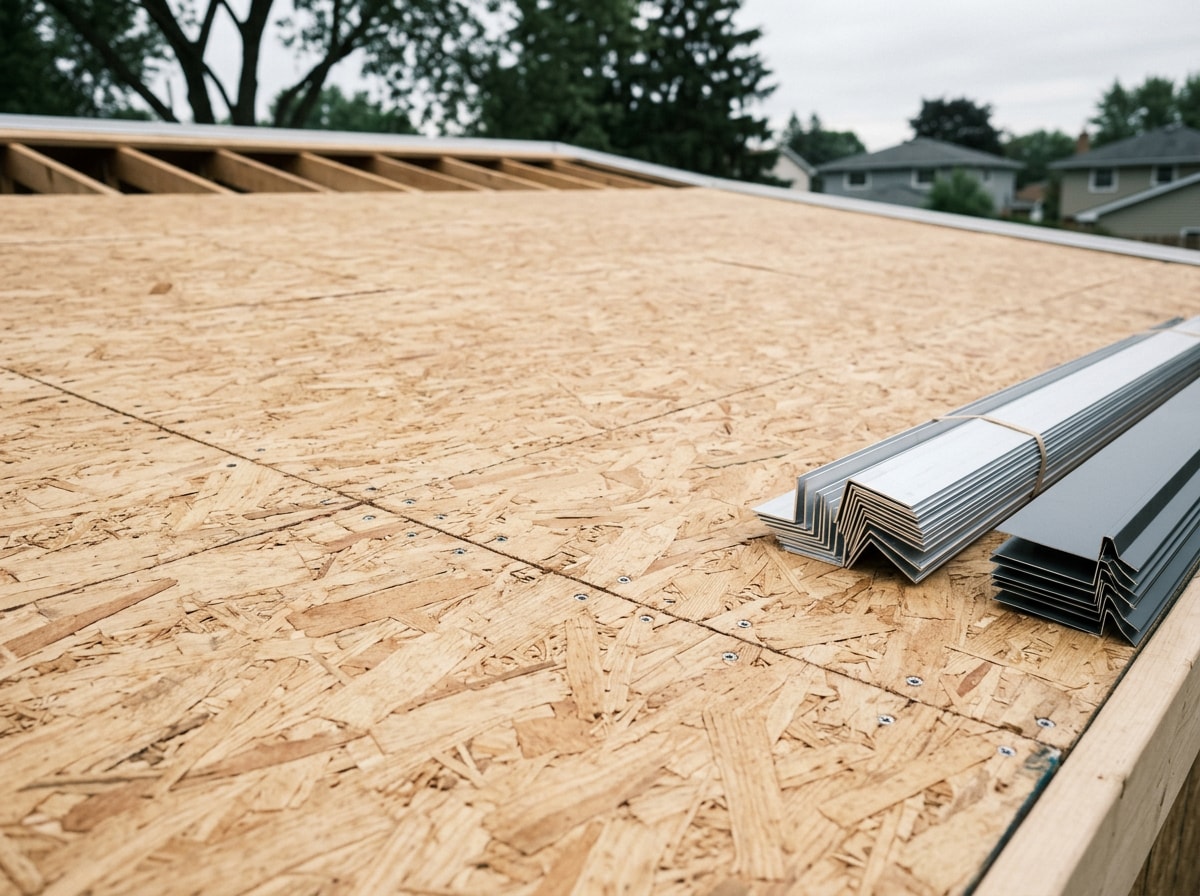
Two checks people skip:
Slope. Thermoset single-ply roofs are generally required to have a design slope of at least 1/4 inch per foot so water drains instead of ponding. Virginia work follows the Uniform Statewide Building Code, and the current editions are published by the Virginia Department of Housing and Community Development. Your local building department confirms permit requirements.
Moisture. Trapped water turns into blisters under a bonded sheet. Tape a two-foot square of clear plastic to the deck, leave it a few hours in sun, and look for condensation underneath before you open an adhesive tin. If it fogs, the deck is not ready.
Most adhesives want roughly 41 degrees F and rising, with no rain in the forecast and light wind. If you are not sure the deck under your old flat roof is sound, a professional roof inspection is cheaper than discovering rot after the membrane is glued down.
Step 2: Measure, Cut, and Relax the Membrane
Measure length by width at the deck, then add allowances on every side:
- The full height of each upstand or parapet the membrane must climb
- 4 inches of overhang at every open edge
- 2 inches spare for trimming error
For awkward layouts, size the sheet to the largest rectangle that covers everything. One oversized sheet is cheaper than patching. Penetrations such as soil pipes get cut in later, never pre-cut on the ground.
Unroll on a clean surface, identify the correct face (the underside is usually dull or printed), and cut with a fresh blade against a straight edge. Cut generous rather than tight. Trimming a bonded sheet is easy, stretching a short one is impossible.
Then leave the sheet alone for 30 to 60 minutes, longer in cold weather. This relax period lets transport creases drop out and the rubber settle to deck temperature so it will not shrink or wrinkle after bonding. In cold conditions, store the roll indoors overnight first. Warm rubber rolls out flat, cold rubber fights you.
Step 3: Apply the Water-Based Deck Adhesive
Fold back exactly half the sheet onto itself, keeping the fold line straight.
Roll water-based adhesive onto the exposed deck with the 9 inch roller, working in sections you can cover before the adhesive skins over. On hot days, halve your section size rather than racing it.
Leave an unglued border around the whole perimeter, usually 6 to 8 inches, plus the full height of any upstands. That zone gets contact adhesive later.
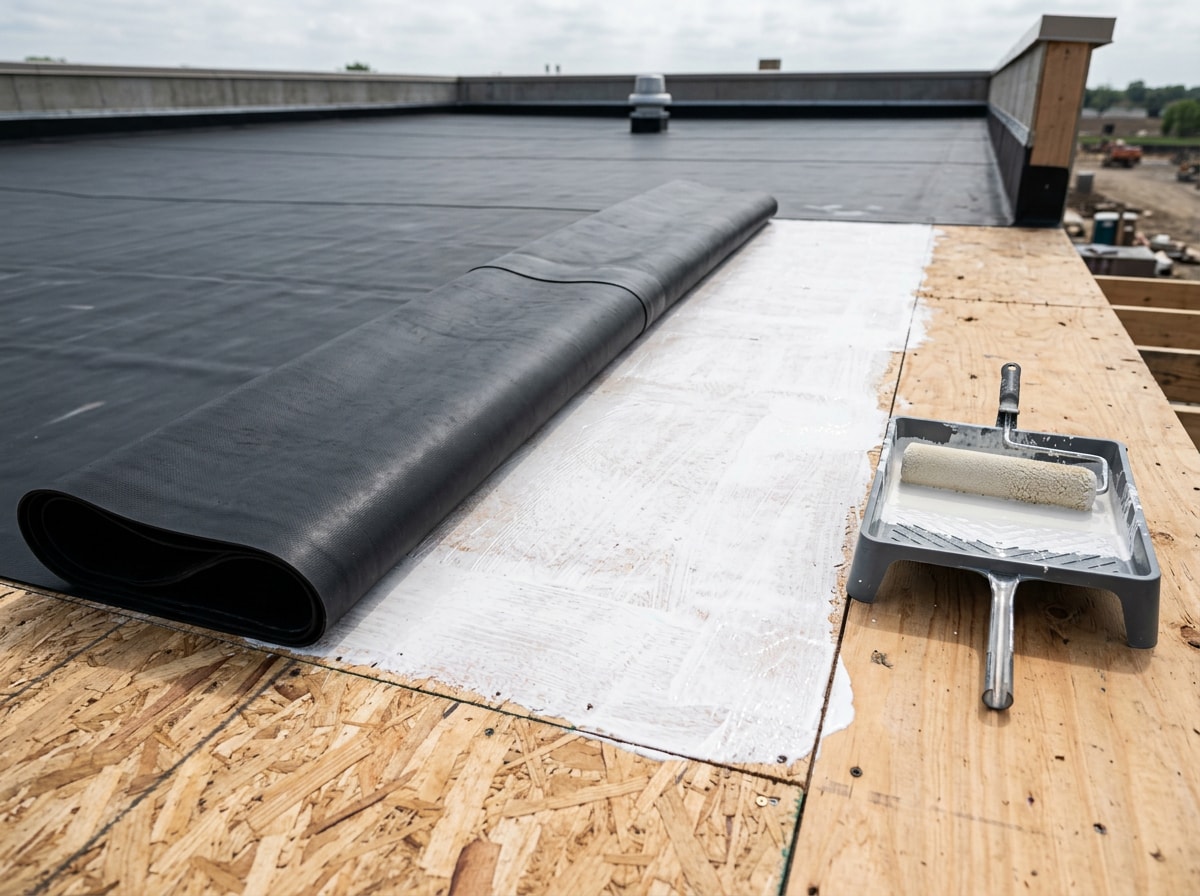
Two rules that decide whether this works:
- Water-based adhesive goes on the deck only, never on the membrane underside.
- Roll the membrane back while the adhesive is still wet, then sweep from the centre outward with a stiff push broom to drive out air.
Repeat the whole sequence on the second half.
Step 4: Bond the Perimeter and Upstands with Contact Adhesive
Here the method flips. Contact adhesive goes on both mating surfaces: the perimeter deck band, the matching membrane underside, and every vertical upstand. Use the 4 inch mini roller for control.
Wait until both faces are touch dry, tacky but with no transfer to the back of a finger, typically 10 to 20 minutes. Then mate them carefully. Contact adhesive grabs instantly and will not let you reposition.
This perimeter bond does the heavy lifting against wind uplift and water ingress, because edges are where wind pressure peaks and where water tries hardest to get underneath.
Need the detail work handled on a bigger or multi-level roof? Our roof installation team covers flat and low-slope work, and you can see finished examples on our project gallery.
Step 5: Seam Multi-Sheet Roofs
Single-sheet roofs skip this entirely. If your roof needed two or more sheets, treat the joint as the most important detail on the roof.
- Overlap the sheets by a minimum of 3 to 4 inches.
- Clean both mating faces with EPDM cleaner and let them dry.
- Apply seam primer to both faces and let it flash off until tacky.
- Apply seam tape to the bottom sheet, release film still on.
- Lower the top sheet without trapping wrinkles, peel the film progressively, and press as you go.
- Work a weighted seam roller from the centre outward along the full length.
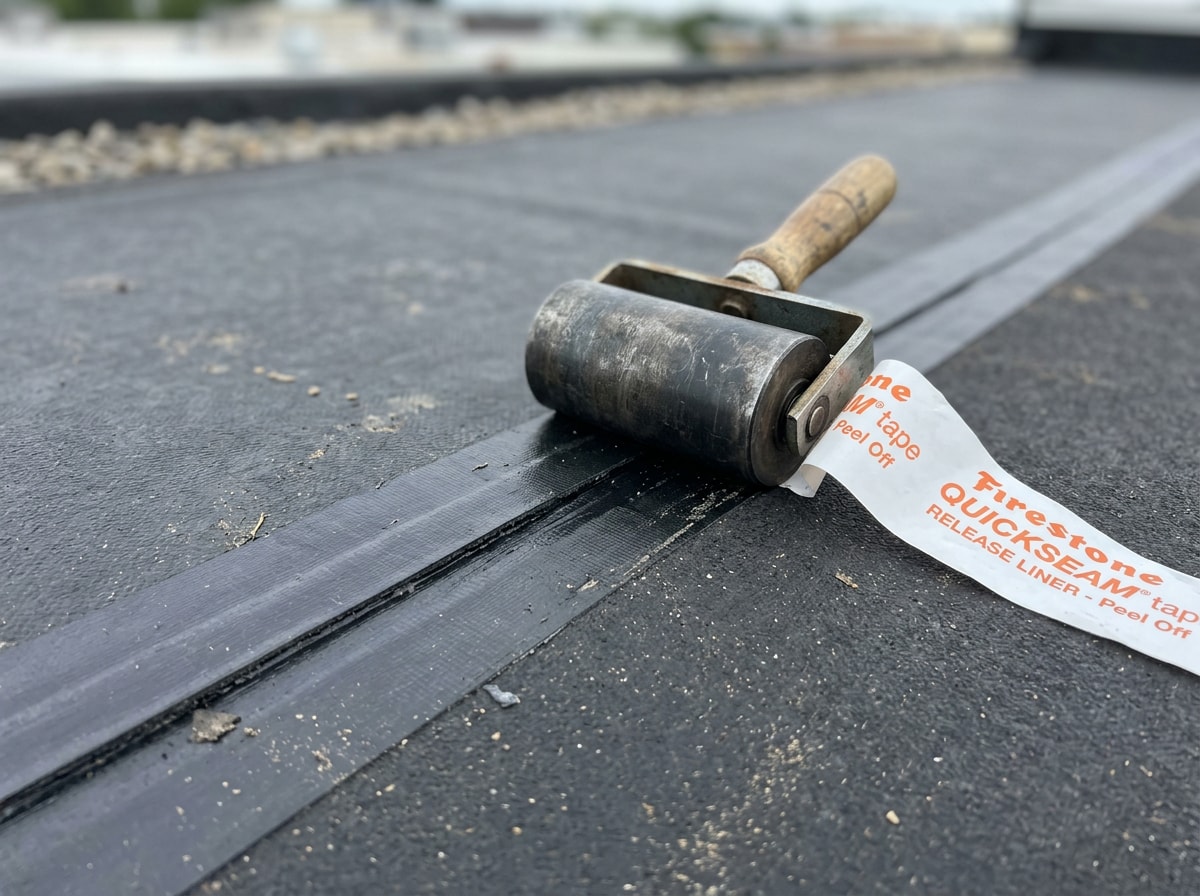
Seam tape has largely replaced liquid splicing adhesive because it bonds more consistently. Seams remain the most common long-term leak point on any rubber roof, so slow down here.
Step 6: Trim, Flash, and Seal the Edges
Trim the excess membrane back to your intended overhang with a sharp blade, cutting against the trim line rather than freehand.
Then fit the trim family:
- Kerb edge trim on closed sides
- Drip trim discharging into the gutter
- Preformed corner pieces at external corners
- Wall flashing tucked into a chased mortar joint and pointed
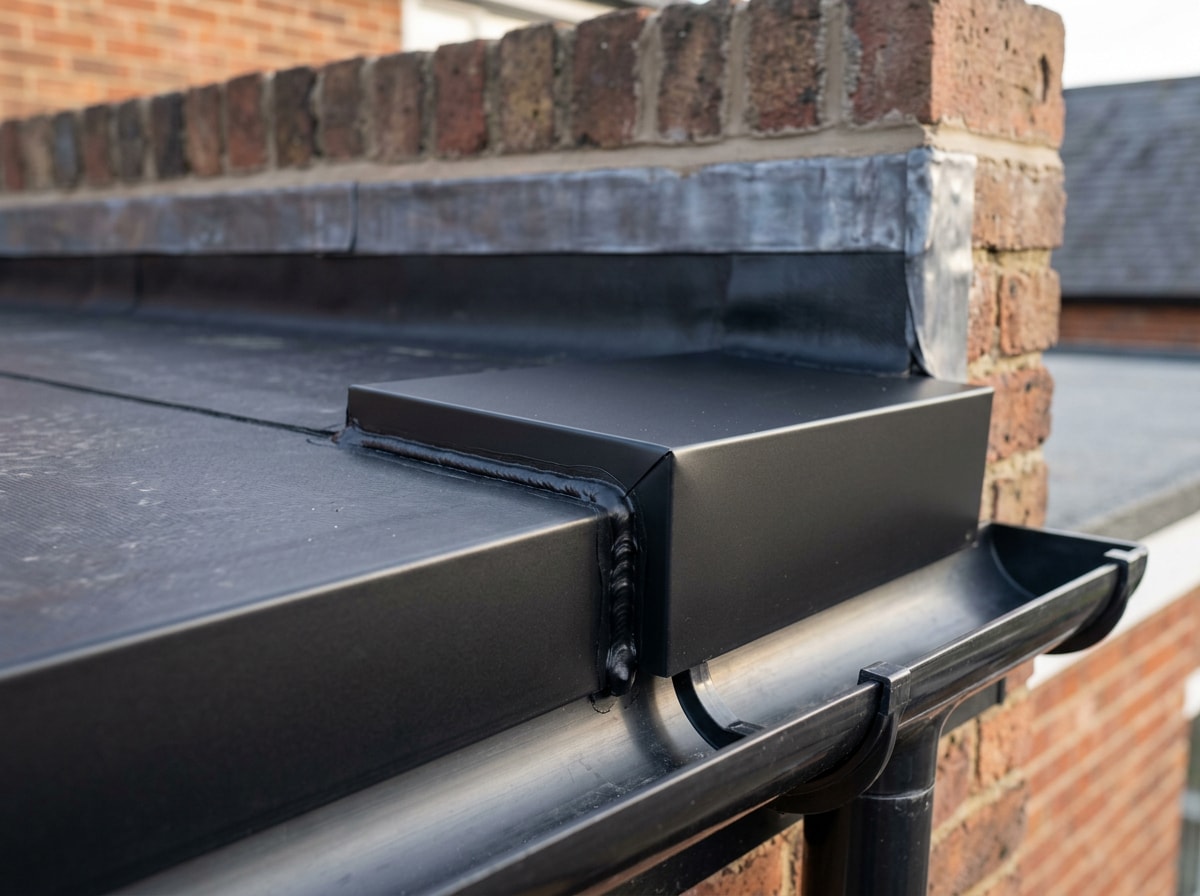
Fix trims and termination bars at roughly 6 to 8 inch centres, pre-drilling where needed. At external corners, fold the membrane into a neat "pig's ear" and dress it flat under the trim. Cutting that corner creates a future leak.
Finish by running lap sealant or neutral-cure silicone along all trim joints and the top edge of the wall flashing. If the roof drains into guttering, now is the moment to confirm the drip trim actually discharges into it rather than behind it, which is where gutter repair calls usually start.
Five Mistakes Behind Most DIY EPDM Failures
From what we find on tear-offs, these repeat constantly:
- Fasteners left proud. A single nail head telegraphs through and punctures within a year.
- Adhesive on the wrong surface. Water-based on the membrane underside never cures properly, and the sheet floats.
- No relax time. The sheet is bonded under tension and pulls wrinkles at the corners as it settles.
- Contact adhesive mated wet. It skins over later, bonds weakly, and the edge lifts in the first real wind.
- Cut corners instead of folded. Every cut at an external corner is a seam you did not plan for.
None of these show up on day one. They show up in the second winter.
Rubber Roofing Cost and Time in 2026
Expect DIY materials to run roughly $1.50 to $3.50 per square foot in 2026, and professional installed cost around $6 to $13 per square foot, based on current supplier pricing and typical contractor quote ranges. Published figures vary widely by region, so treat this as a budgeting range, not a quote.
For a 400 sq ft garage roof, that is roughly $600 to $1,400 in materials on the DIY route, or around $2,400 to $5,200 installed.
What moves the number:
- Membrane thickness (45, 60, or 90 mil)
- Installation method
- Tear-off of the old covering
- Deck repairs discovered mid-job
- Roof access and number of penetrations
Want a firm figure instead of a range? Get a free estimate and we will measure the roof properly.
Installation Methods Compared
Three systems exist, and the one you pick changes your tools, budget, and warranty.
| Method | Est. installed cost per sq ft | Wind uplift resistance | Install speed | DIY feasible | Warranty notes |
|---|---|---|---|---|---|
| Fully adhered | $6 to $13 | High | Slowest | Yes | Broadest coverage |
| Mechanically fastened | $5 to $10 | High (engineered) | Fast | Limited | Often needs a certified installer |
| Ballasted | $4 to $8 | Depends on ballast weight | Fastest | Partly | Narrow, deck load limits apply |
- Choose fully adhered if the roof is small, visible, and you are doing the work yourself.
- Choose mechanically fastened for a large commercial deck on a tight schedule.
- Choose ballasted only if the structure is rated for the extra weight.
This guide covers the fully adhered route. Membrane thickness and performance properties are graded under ASTM D4637, the specification for EPDM sheet in single-ply roof membranes, which manufacturers cite on their spec sheets.
When EPDM Is the Wrong Call
EPDM suits low-slope structures: garages, dormers, extensions, sheds, and porches. It is not for steep pitched roofs, where shingles or metal shed water faster and look right.
| Material | Typical lifespan | DIY-friendly? |
|---|---|---|
| EPDM | 20 to 35 years | Yes, adhesive only |
| TPO | 15 to 25 years | No, heat welded |
| Modified bitumen | 10 to 20 years | Rarely, torch or hot mop |
Still weighing options? Our comparison of which roofing materials last the longest covers the trade-offs across the whole range.
If the deck is rotten, the roof is over two storeys, or there are five penetrations to detail, the job has stopped being a weekend project. That is when a roof replacement quote makes more sense than a second trip to the supplier. We handle flat and low-slope roofs across Fredericksburg, VA and the surrounding counties, and you can see the full service list on our homepage.
FAQ
Can I install a rubber roof myself?
Yes, on simple roofs. A flat, unobstructed deck under about 500 sq ft with one or two penetrations is a realistic DIY project for anyone comfortable with basic tools. Check the warranty first, because some manufacturers only honor coverage on certified installations.
Are special tools needed for EPDM installation?
No. EPDM needs no heat welding, torching, or nail gun, just a utility knife, rollers, a push broom, and a seam roller. TPO and PVC both require a hot-air welder and the training to use one safely.
Can you install rubber roofing over an existing roof?
Sometimes. If the old covering is sound, flat, dry, and firmly attached, overboarding with new sheathing is an option. It adds height at door thresholds and trims, so check clearances first. Anything soft, blistered, or wet gets torn off.
What temperature can you install EPDM in?
Most adhesives want roughly 41 degrees F and rising, with a dry deck and low wind. Below that, open times stretch, water-based adhesive struggles to cure, and the membrane stiffens. Always check the specific temperature window on the adhesive tin.
How long does a rubber roof last?
Most sources put EPDM lifespan between 20 and 35 years, and well-installed membranes sometimes exceed that. Thickness, installation method, UV exposure, and basic annual maintenance all shift where a given roof lands in that range.
How much does rubber roofing cost per square foot?
Budget roughly $1.50 to $3.50 per square foot for DIY materials, or about $6 to $13 per square foot installed in 2026. Tear-off, deck repairs, and access are the biggest swing factors.
How soon can a new EPDM roof get rained on?
The water-based deck adhesive needs to cure, so plan the job around a clear weather window and get the perimeter bonded and trims sealed the same day. A sheet bonded in the field but open at the edges is not watertight.
Do I need a permit to install a rubber roof?
Often yes, especially on a dwelling or where structural repairs are involved. Permit rules are set locally under the state building code, so call your county or city building department before you start.