Learning how to install roofing felt comes down to three things: a dry deck, straight layout lines, and laps that always shed water downhill. Everything after that is repetition. Get the laps backward and you have built a funnel into your sheathing instead of a backup layer.
How to Install Roofing Felt in 7 Steps
- Clear and dry the deck, then replace any soft sheathing.
- Nail drip edge along the eaves, under where the felt will sit.
- Snap a chalk line for the first course.
- Roll the first course parallel to the eave, over the eave drip edge.
- Cap nail it flat, working out wrinkles as you go.
- Lap each course over the one below, offsetting end laps.
- Run felt over the ridge, trim at penetrations, and install rake drip edge on top of the felt.
That is the whole job. The rest of this guide covers the dimensions, fastener spacing, and details that decide whether it holds.
Tools and Materials
- Roofing felt or synthetic underlayment (check the slope rating on the roll)
- Cap nails or a cap nailer, plus a hammer tacker if your code allows staples
- Drip edge, tin snips, and roofing nails
- Chalk line, utility knife with hook blades, tape measure
- Push broom, flat bar, cat's paw for protruding nails
- Harness, rope, and anchor; soft-soled boots; a ladder that extends three feet past the eave
Felt rolls are sold by coverage, not weight. A standard 15 lb roll commonly covers about four squares (400 square feet) and a 30 lb roll about two squares, so figure your roof area first and add 10 percent for laps and waste.
Step 1: Prep the Roof Deck
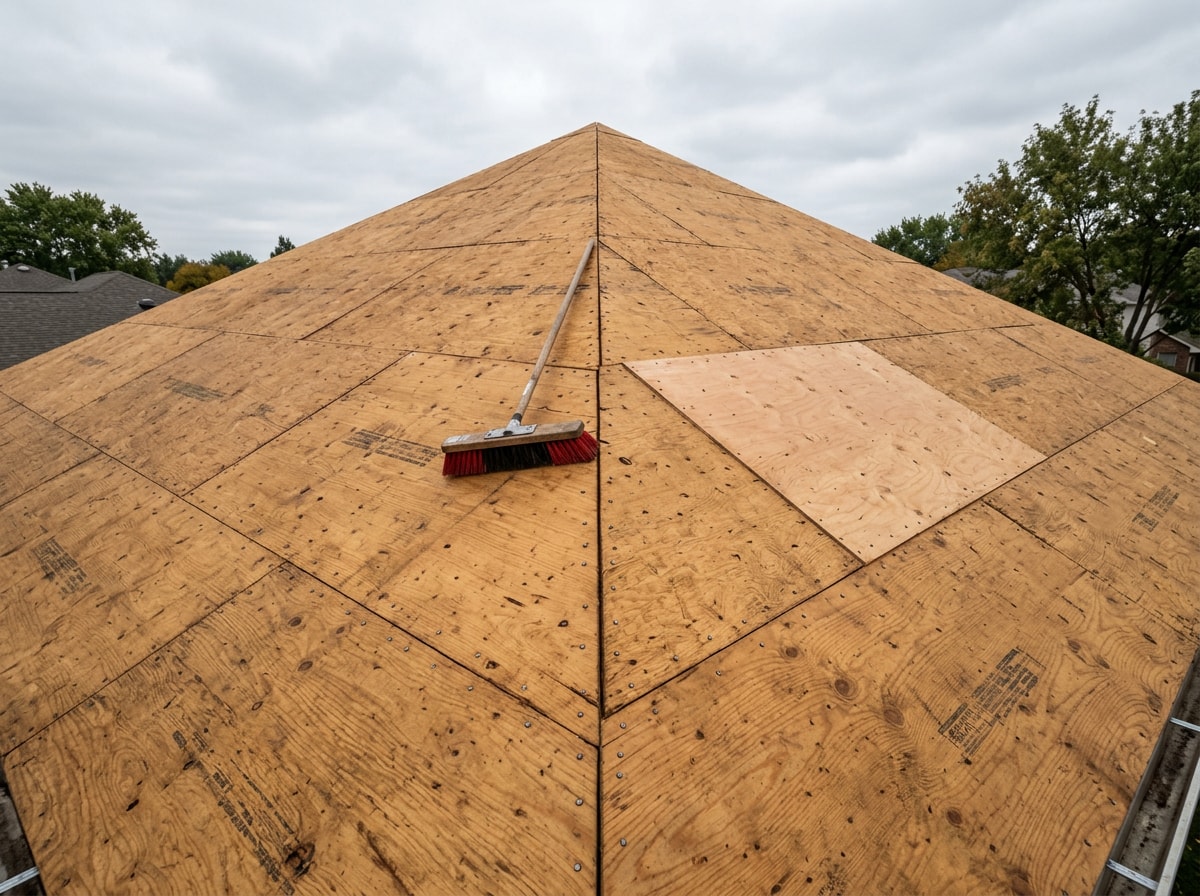
Sweep the sheathing completely clear of debris, dust, and splinters.
Pull or drive down protruding nails. Scrape old adhesive. Clip anything sharp that could puncture felt from underneath.
Replace damaged or spongy panels now, not later. Manufacturers are explicit that rotted sections be repaired or replaced before underlayment goes down, and that the deck be dry to prevent buckling that can damage the finished roof covering.
Never start on a frosted or rain-soaked deck. Felt over damp sheathing traps that moisture under a finished roof, where it has nowhere to go but into the boards.
If the sheathing looks questionable from the attic side, a professional roof inspection costs far less than re-decking after the shingles are on.
Step 2: Install the Eave Drip Edge
Start the drip edge at the eaves, cutting the flashing at an angle where it turns a corner, and nail it along a chalk line roughly a foot apart. Overlap each piece at least two inches and nail through the lap.
Order matters, and it is the detail most DIY roofs get wrong:
- Eaves: drip edge goes down first, felt goes over it.
- Rakes: felt goes down first, drip edge goes over it.
Manufacturer field guides spell out the same sequence: underlayment over the eave metal, and under the drip edge at the rake so any water that gets in flows over the underlayment.
Tucking the felt under the rake metal also helps resist wind uplift at that edge.
Verify the fastener spacing and lap dimension your local inspector enforces against the IRC Chapter 9 roof assembly provisions before you buy.
Step 3: Snap Chalk Lines and Set the First Course
Snap a line for the top edge of the first course and let the felt overhang the eave drip edge by about half an inch.
Check that overhang at several points along the run before you fasten anything. A course that drifts a quarter inch per sheet is badly out of square by the time you reach the ridge.
A straight first course pays twice. It gives you reliable reference lines for every shingle course stacked above it.
Step 4: Roll Out and Fasten Each Course
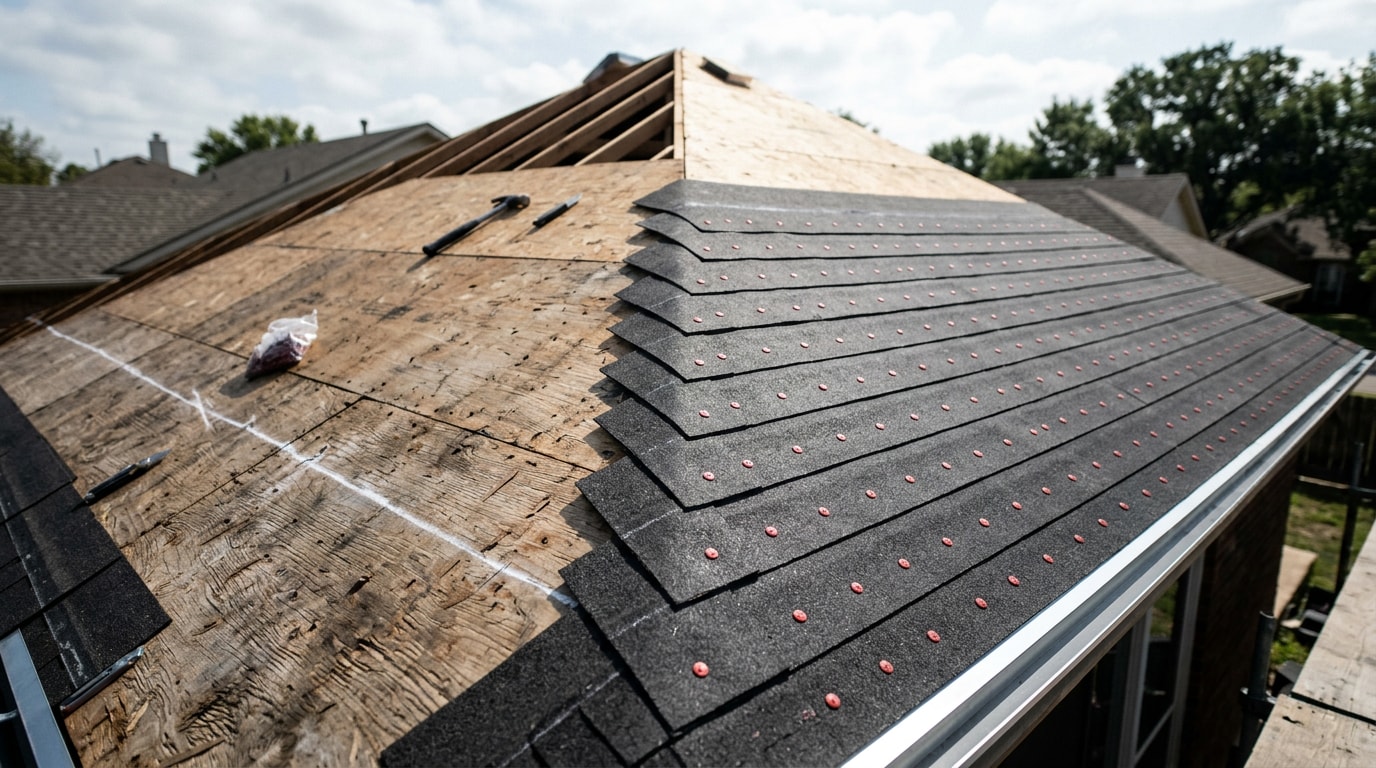
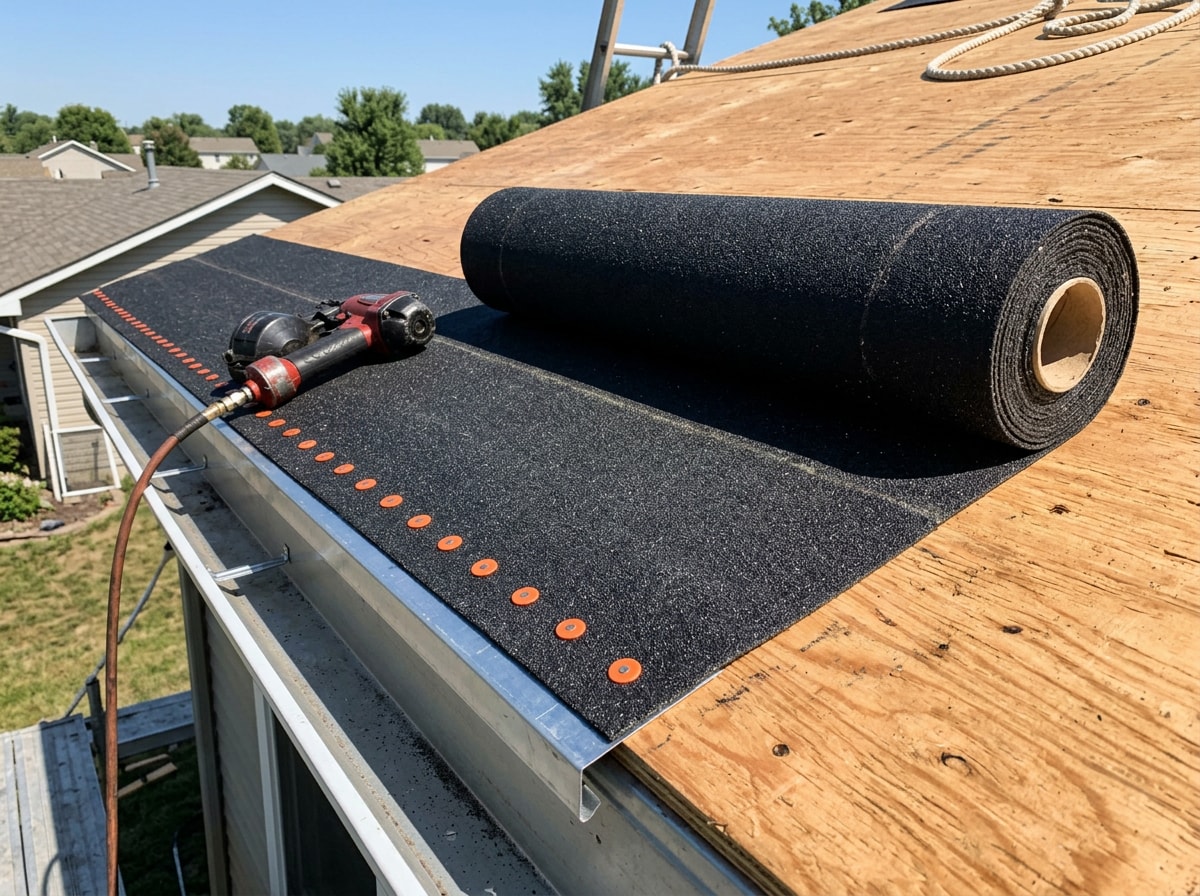
Begin at the eaves and roll the felt parallel to the gutter. Tack the bottom corner square to the end of the roof, run the bottom edge over the drip edge, and unroll roughly ten feet at a time with the top portion left free.
Apply it parallel to the eaves, lay it flat, cap nail it flat, and do not stretch it during installation.
Slack and wrinkles telegraph straight through finished shingles, which is why you flatten each course before it is fully fastened.
Fastener spacing, in plain terms:
- Low-wind, shingles going on same day: cap nails roughly every 8 to 10 inches on edges, 12 to 18 inches in the field.
- Steep pitch, windy site, or deck left exposed overnight: tighten to 4 to 8 inches.
- Wind-design regions:
ring or deformed shank cap nails with 1 inch caps, a 12 inch grid between side laps, and 6 inches at side and end laps.
Code also sets the hardware itself: plastic caps at least 0.035 inch thick at the outside edge, a shank of at least 0.083 inch, long enough to penetrate the sheathing or go at least 3/4 inch into it.
Skip bare staples on synthetics. At least one major manufacturer prohibits nails or staples without caps on its synthetic felt and requires plastic cap fasteners.
Step 5: Lap Dimensions That Actually Pass Inspection
Every course laps the one below so water runs over a seam, never into it. The numbers change with slope and with the product you bought.
| Detail | IRC, 4:12 and steeper | IRC, 2:12 to under 4:12 | Synthetic example (GAF FeltBuster) |
|---|---|---|---|
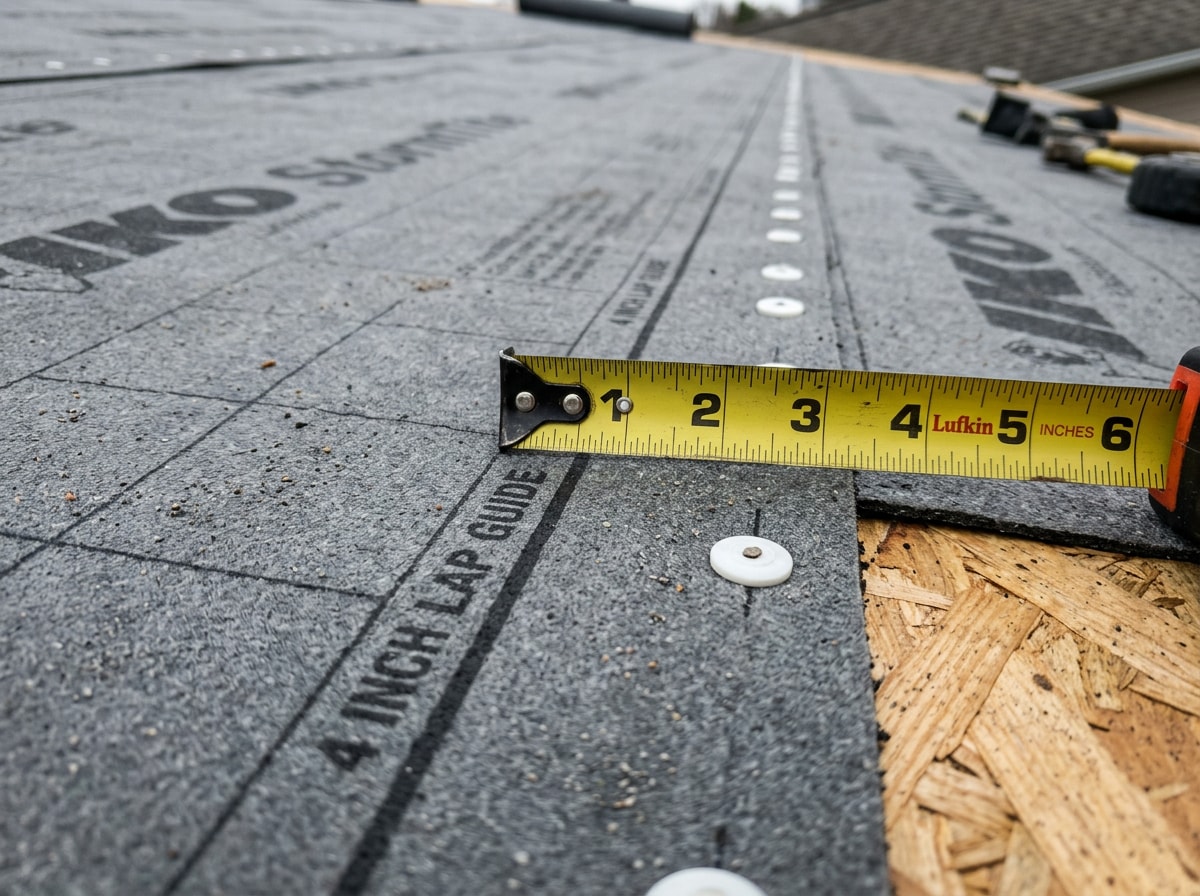
| Head / side lap | 2 in, single layer | 19 in, double coverage | 3 in side lap |
| End lap | 4 in | 4 in | 6 in |
| End lap offset | 6 ft | 6 ft | 3 ft |
| Low-slope method | Not applicable | 19 in starter strip, then 36 in sheets | 25.5 in overlap, 22.5 in exposure |
The 2021 IRC spells out both methods in Table R905.1.1(2): the two-layer approach using a 19 inch strip at the eave followed by 36 inch sheets lapped 19 inches, and the single-layer approach lapped 2 inches with end laps of 4 inches offset 6 feet.
Synthetic specs run tighter: one common product calls for 6 inch end laps offset 3 feet, and double coverage below 4:12 using a 25.5 inch overlap with a 22.5 inch exposure.
Two things most step-by-step articles leave out:
The end-lap offset is not optional. Stacking end laps in a vertical column creates a repeating weak seam straight up the roof. Code calls for staggering them, and in the IRC single-layer method that stagger is six feet.
Manufacturer instructions override rules of thumb. Read the roll wrapper or the printed installation instructions before you set lap spacing from memory. Warranty claims get denied on this detail.
Low-slope roofs need doubled coverage because water moves slowly and backs up at seams instead of running off.
Step 6: Valleys, Hips, and Penetrations
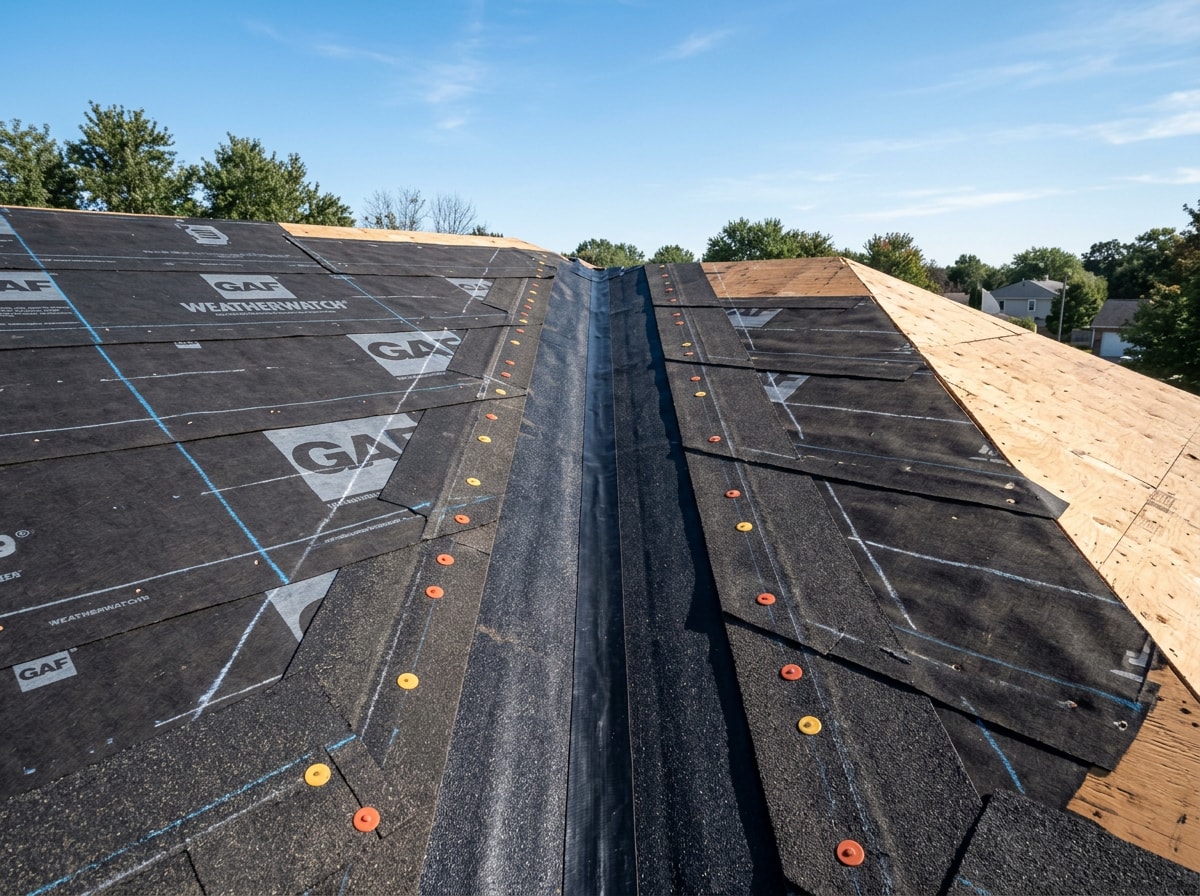
Valleys carry concentrated runoff, so they get treated first and treated differently.
- Run the valley material down the centerline before the horizontal courses, then lap the field courses over it.
- Snap chalk lines as a guide, smooth the membrane flat, and tack one side before working across.
- Most roofs in freeze-thaw climates call for self-adhered ice and water membrane here rather than plain felt.
- Keep fasteners well back from the valley centerline.
Hips work in reverse. Run the felt up to the hip, fit the pieces closely, then lay a vertical strip along the hip so it overlaps both sides.
At vent pipes and chimneys, cut the felt tight to the penetration and work the material under or over the flashing in the direction water travels.
Step 7: Finish at the Ridge and Walk It
Continue up the slope and lap 3 to 4 inches over the peak, fastening each side, then repeat the sequence on the opposite slope.
Install the rake drip edge now, on top of the felt.
Then walk the roof once more before shingles. Look for loose top edges, fasteners that tore through, unsealed penetrations, and any wrinkle you can still flatten.
Cover exposed deck the same day when weather allows. If more felt is down than you can shingle before dark, tighten the fastener schedule on the exposed portion.
What We See Go Wrong on Tear-Offs
Our crews pull off plenty of roofs in Fredericksburg, VA and the surrounding counties, and the felt failures repeat:
- Laps running uphill at one transition, usually where a new roll started mid-slope.
- End laps stacked in a column, creating a wet stripe of darkened sheathing straight up the deck.
- Staples with no caps on synthetic underlayment, with the fastener heads pulled through after one windy week of exposure.
- Felt over damp decking, where the plywood edges have cupped and the shingle courses above read like a washboard.
- No drip edge at all, with fascia rot behind the gutter line.
None of those show up on inspection day. They show up three to seven years later as a stain on a bedroom ceiling. If you want to understand what the layer under your shingles is and is not doing, read what felt underlayment actually protects against.
Safety and Field Tips
- Fall protection first.
OSHA requires workers in residential construction at six feet or more above a lower level to be protected by guardrails, safety nets, or a personal fall arrest system , per OSHA's residential fall protection guidance. Homeowners are not covered by the standard, but gravity does not check your employment status.
- Work early or late in the day. Hot felt stretches and scuffs underfoot.
- Store rolls flat, dry, and indoors. A crushed or damp roll never lies flat.
- Tack the center of a sheet before cutting so wind cannot catch it.
- Never step on felt that is not fastened. It slides.
- Set the ladder on firm ground, extended three feet past the eave.
When to Hand It Off
Felt is forgiving on a simple gable and unforgiving on anything with valleys, dormers, or a pitch above 8:12. If the layout has more cuts than runs, the time you spend learning is time the deck sits open.
We handle roof installation, roof replacement, and roof repair across the region, and underlayment detailing is part of every scope. See finished work on our projects page or get a free estimate before you open the deck.
FAQ
How much overlap is needed for roofing felt?
On roofs 4:12 and steeper, lap courses 2 inches with 4 inch end laps offset 6 feet. Slopes from 2:12 to under 4:12 require double coverage, a 19 inch starter strip followed by 36 inch sheets lapped 19 inches. Synthetic products often specify more, so check the roll.
Do you nail or staple roofing felt?
Cap nails hold better and are required in wind-design regions. Some synthetic underlayments prohibit uncapped nails and staples outright. Hammer-tacker staples are still accepted by many local officials on asphalt felt that gets shingled the same day, but your inspector has the final word.
Does felt go over or under the drip edge?
Over at the eaves, under at the rakes. The eave metal goes on first with underlayment laid over it, and the rake drip edge goes on top of the underlayment so infiltrating water flows over the felt rather than behind it.
Which side of roofing felt faces up?
For standard asphalt felt, either side works, though most installers run the printed guide lines facing up. Synthetic underlayment is directional: the slip-resistant printed surface must face up.
How long can roofing felt be left exposed?
Asphalt-saturated felt should generally be covered within a few days to about two weeks before UV exposure, curling, and wrinkling set in. Many synthetics carry published exposure ratings measured in months. Use the product's data sheet rather than a general figure.
Is 15 lb or 30 lb roofing felt better?
Neither is universally better. 15 lb suits budget jobs in mild climates; 30 lb resists tearing and foot traffic better and holds up longer if the deck sits exposed. Both are commonly specified to ASTM D226 Type I or Type II , and the 15/30 labels are nominal rather than actual roll weights.
Do you need felt under shingles?
Yes in almost every jurisdiction. The IRC requires underlayment conforming to listed standards for asphalt shingles, tile, metal shingles, roll roofing, slate, wood shingles, wood shakes, and metal panels. Shingle warranties typically require it too.
Can you install roofing felt on a wet deck?
No. Decks must be dry to prevent buckling, which causes deck movement and can damage the roof covering above. Wait for the sheathing to dry, or you seal moisture under a finished roof.
How much roofing felt do I need?
Divide your roof area by the coverage printed on the roll, then add about 10 percent for laps and waste. A standard 15 lb roll typically covers around four squares and a 30 lb roll around two.
Felt or synthetic underlayment?
Synthetic is lighter, tears less, walks better, and tolerates longer exposure. Asphalt felt costs less per square and lies down more easily over small repairs. Both are code-compliant when the product is labeled to an approved standard and installed to its own instructions.
---
Written by the roofing team at Shark Construction LLC, a licensed and insured roofing contractor serving Fredericksburg, Stafford, Spotsylvania, Culpeper, and surrounding Virginia communities. Questions about your deck or underlayment? Contact us and we will take a look.